Week 3
CSS best practices and intro to Sass
Best Practices
We want to apply the "clean code" philosphy to our CSS. The core tenant here is that if we keep our code well organized, use clear naming conventions, and avoid repetition, it will be easier to read. If it is easier to read, it is easier to understand and easier to maintain.
Default styles
PROBLEM: Every web browser has a default stylesheet, but their default styles are not consistent.
SOLUTION Apply a standard stylesheet to establish a known baseline before creating our own custom styles. In the past we used "reset" libraries to wipe out all styles and then build them back up again. This achieved the intended result, but it meant we had a lot more CSS code in our projects than we needed.
Normalize.css offers a better approach by retaining many useful default browser styles. This means that you don’t have to redeclare styles for all the common typographic elements. When an element has different default styles in different browsers, normalize.css aims to make those styles consistent and in line with modern standards when possible.
TIP
CSS frameworks like Bootstrap or Bulma already include normalize.css, so you don't need to load it again separately.
Box Model
The preferred global default is to set the box-sizing property to border-box. This ensures that padding does not change the overall size of the element. A code snippet that I often use comes from Paul Irish. This will apply a natural box layout model to all elements, but allow any child components to override as needed (like when you embed Google Maps).
html {
  box-sizing: border-box;
}
*,
*:before,
*:after {
  box-sizing: inherit;
}
Read more at https://css-tricks.com/box-sizing/
DRY - Don't Repeat Yourself
The "C" in CSS stands for cascading. That means style properties are inherited from their enclosing elements. We can reduce the number of times we apply common style properties by moving it up the chain to an ancestor element. Let's look at an example.
<main>
  <section class="column-left">
    Ut laboris exercitation tempor ea quis adipisicing incididunt aute velit est
    dolor.
  </section>
  <section class="column-right">
    Ex et ullamco excepteur dolore deserunt fugiat pariatur duis elit minim non
    cillum do.
  </section>
</main>
If we want to apply a certain font family to each column, we could apply it to each column class selector.
.column-left {
  font-family: 'Titillium Web', sans-serif;
}
.column-right {
  font-family: 'Titillium Web', sans-serif;
}
But, it would be better if we only wrote that once. We could apply it to the parent element.
main {
  font-family: 'Titillium Web', sans-serif;
}
Or, if main contained other content that we did not want to recieve this font treatment, we could apply it to both selectors in a compound assignment. Separate the targeted selectors with commas.
.column-left,
.column-right {
  font-family: 'Titillium Web', sans-serif;
}
Another option is to create a single column class for all of the common properties and add two modifier classes for the properties that are distinct to left or right.
.column {
  font-family: 'Titillium Web', sans-serif;
}
.column.left {
  color: red;
}
.column.right {
  color: blue;
}
Minimum specificity
Naming things is hard ... but really important.
- rules of specificiity
- BEM
- compound classes
- avoid compound selectors
READ: What is modular CSS? to learn the latest best practices on CSS class naming conventions.
Pseudo-classes
The most commonly used are those that reflect the current interactive state of a link or a button. e.g.
.button {
  background-color: blue;
}
.button:hover {
  background-color: darkblue;
}
We can also use them to apply zebra striping to a table:
tr:nth-child(odd) {
  background-colour: rgba(0, 0, 0, 0.23);
}
Or, apply a bold text treatment to the last row in the table:
tr:last-child {
  font-weight: 700;
}
There are about 50 of these conditional selectors. They can be powerfull tools to help you acheive the look and feel that you want.
Resources
Use RGBA for font colours
Good contrast ratios make for more comfortable reading. If we set the background colour to a slight off-white and the primary text colour to a desaturated black, our content will be more easily read with will keep visitors on your site longer.
body {
  color: rgba(0, 0, 0, 0.78);
  background-color: #f3ffff;
}
h1,
h2,
h3,
h4,
h5,
h6 {
  color: rgba(0, 0, 0, 0.89);
}
See Google’s Material Design guide for more suggestions.
Refactoring UI
Refactoring UI is a fantastic resource for practical examples of how to acheive a clean modern look to your designs. Steve Schoger and Adam Wathan teach you how to design awesome UIs by yourself explained from a developer's point-of-view.
Lets look at a quick video tutorial 15 mins
In the case study of Redesigning Laravel.io Steve and Adam demonstrate how 20 small, iterative tweaks, result in a design that feels a lot more polished and up to date.
As a free sample of their upcoming book, this article entitled Line-height is proportional talks about why setting one default line-height in your CSS is not the best strategy.
For more examples, checkout Steve and Adam's website at https://refactoringui.com
Smarter CSS
The CSS standard is constantly evolving, e.g. flex, grid, custom elements.
Preprocessors such as less, scss, and cssnext provide extended capabilites while ensuring broad browser compatibility.
Sass
Key features of Sass:
- Variables
- Nesting
- Partials
- Import
- Mixins
- Extend / Inheritance
- Dynamic calculations
Install Sass
npm install -g sass
Use the sass command to compile our main.scss file into main.css.
sass main.scss main.css
Compiling scss to css
When we are developing websites we need to test frequently and it can be a pain to have to manually compile the Sass file to css every time we make a change. Fortunately, the Sass compiler includes a watch mode that actively watches the files or folders that you choose and everytime you save a new version, it will automatically compile.
To watch a single file
sass --watch main.scss main.css
or watch a whole folder e.g. watch the src/sass folder for any file that changes and compile it to the dist/css folder.
sass --watch src/sass:dist/css
In-class Exercise 3-1
1. Install Sass
Open a terminal and run these commands ...
npm install --global sass
sass --version
You should see something like 1.13.4 compiled with dart2js 2.0.0
2. Accept the GitHub Classroom assignment
Reference
Step-by-step reference on how to work with assignments on GitHub Classroom.
3. Clone the assignment repo
On GitHub, click the green Clone or download button and then copy the path shown
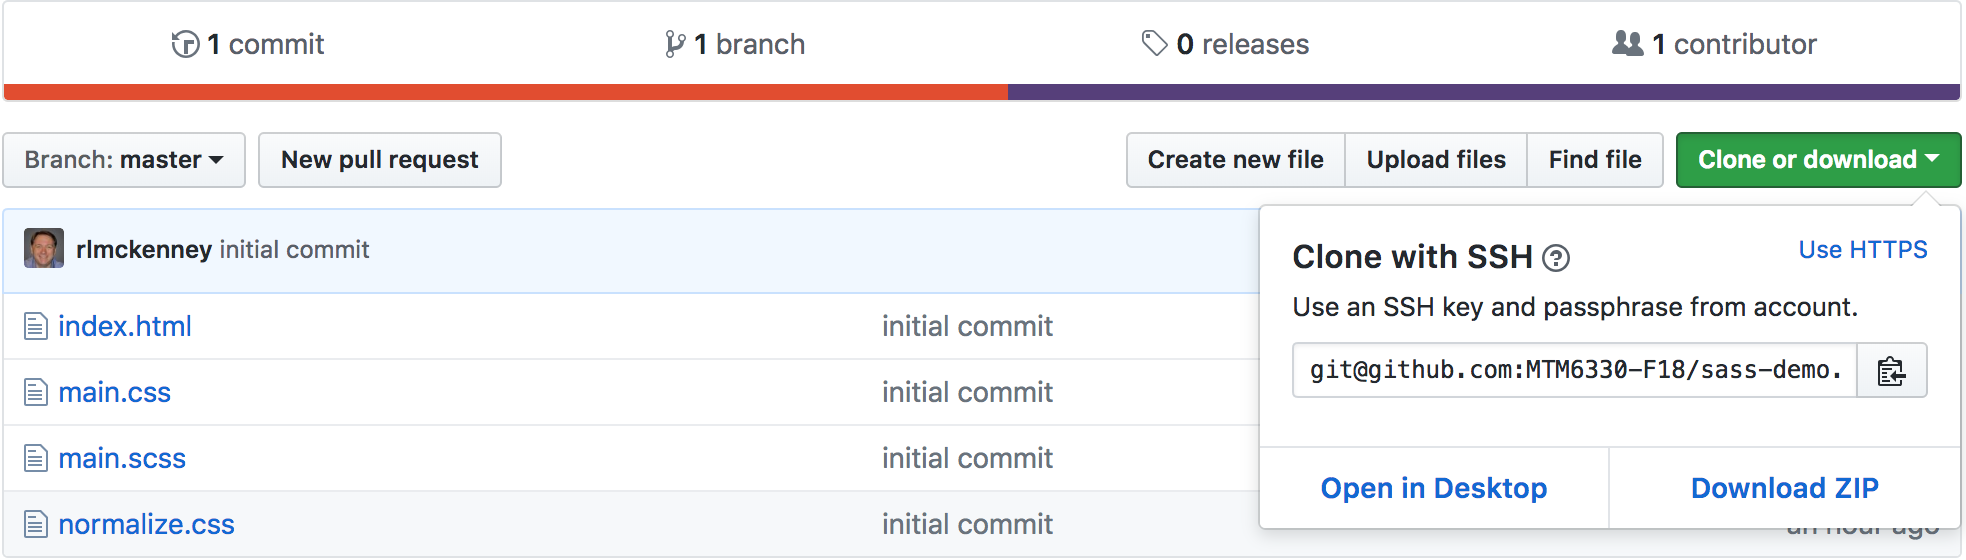
git clone path_to_repo_copied_above
cd sass-demo
code .
4. Compile the "main.scss" file to CSS
Open the integrated terminal in VS Code. Use the keyboard shortcut: CTRL` or select Terminal from the View menu. Then run the following command in the terminal window.
sass main.scss main.css
5. Change the body's background-color by updating the Sass variable
6. Compile again
7. Create a local git commit with the message, "Changed background colour."
In VS Code, select the git tools tab (third from the top in the left hand menu).
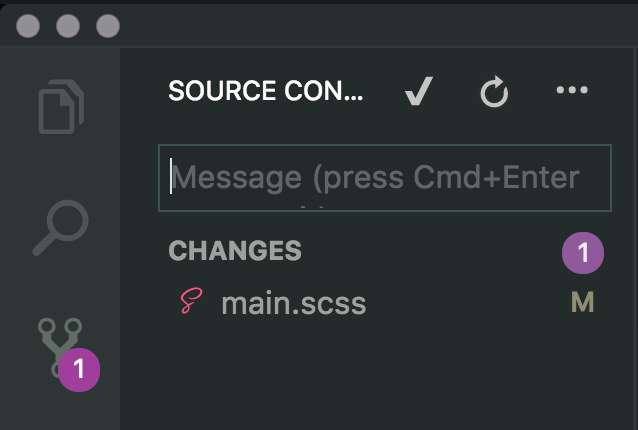
Remember
This view only shows the changed files.
Next, hover over the name of the change file(s) that you want to add to the staging area and click the + button that appears.
Now that your files are staged, type the commit message to describe the changes that we have made in the commit (snap-shot): Changed background colour
Next click the check-mark above the commit message to complete the commit. Or, you can press CMDEnter on the keyboard to complete the commit.
Alternatively, you could do this in the terminal.
git add main.scss
git commit -m "Changed the background colour"
8. Push to GitHub
This can also be done right in VS Code. In the bottom left corner of the screen click the synchronize changes button next to the branch name (in this case, the branch name is master).

This button shows the count of commits that are ready to pull down or push up.
Alternatively, you could complete this step in the terminal.
git push origin master
This tells our local git repository to push all of the latest commits on our current local branch (which is master at this point) to the remote repository labled origin and sync those commits with the remote's branch called master.
If we omit the last two parameters (origin and master) and just say ...
git push
then git will assume the default remote repository of origin and the remote branch of the same name as our local working branch, in this case master.
Prepare for week 4
Reading
Prepare for CSS refresher quiz: CSS for designers video tutorial
Assignments
- Midterm Project Mockups are due before next class